The following guides are for illustrative purposes only and do not constitute advice. FWDirect cannot be held liable for any damage or accidents. Always consider manufacturer or professional installation advice.
Celotex insulation boards can be used in a variety of different applications. Here we offer a step by step guide to installing Celotex insulation boards in many of these applications. We would always recommend consulting a specialist before installing insulation.
Celotex is a leading brand in the UK that manufactures PIR (polyisocyanurate) insulation boards. PIR insulation boards are a durable, rigid and lightweight insulation consisting of PIR foam sandwiched between two high-performance aluminium facings. They work by trapping air and reducing the thermal conductivity of a space. Their closed-cell structure also means that they are water-resistant, making them the perfect solution in areas that experience high rainfall and moisture.
These rigid insulation boards are popular throughout construction and offer a more affordable alternative to other brands such as Kingspan, without compromising on performance. Celotex insulation boards have a thermal conductivity of 0.022 W/mK making them an effective and efficient choice.
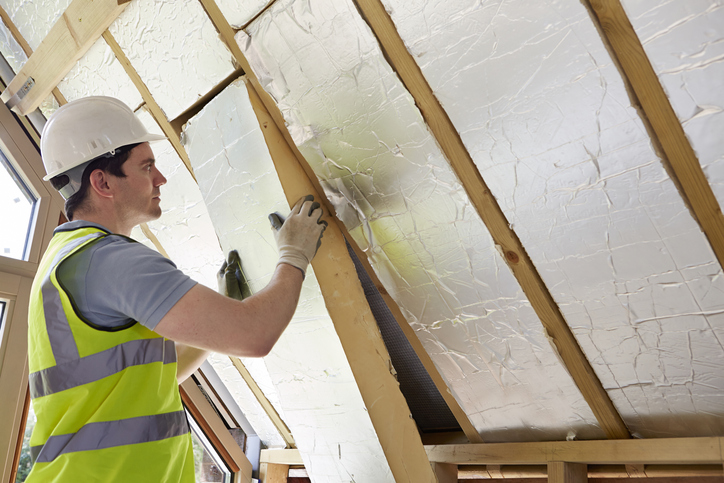
If you need to cut any of your Celotex insulation boards you should wear appropriate protective gear. Goggles or safety glasses should be worn, and we recommend wearing protective clothing.
When you cut your insulation boards it will create dust particles, so protecting your eyes is important, as well as ensuring you do not inhale any of the debris. Wearing thick gloves is always recommended to avoid accidents.
We would recommend using a hand saw to cut through the boards to minimise dust creation. Saving your off-cuts is advisable as they can be used to fill in any gaps during installation.
Things to consider:
If you are using Celotex products, ensure that use of the product meets all relevant national Building Regulations and guidance. Be sure to check local, national and other applicable standards that are relevant to your construction or application, this includes any requirements in relation to fire and/or applicable height restrictions.
Read the following documents prior to installation:
Contents:
Masonry partial-fill cavity walls are one of the most popular types of external wall constructions. In these types of wall, the residual cavity between the two leaves of masonry is partly filled with a PIR cavity board.
In this application, the insulation boards are placed against the inner leaf of blockwork and are held in position by wall ties. The wall ties are used to tie the two skins of masonry together.
It is important that the wall ties are sufficient for structural requirements, and that they have a retaining clip which will hold the insulation in place permanently. We would recommend ensuring they are BBA approved. Celotex consider butterfly ties to be unsuitable for partial-fill cavity walls.
You will need:
Please note; The PIR cavity boards are to be installed between two different types of masonry. A 50mm residual cavity has to be maintained between the outer face of the cavity insulation and the inner face of the outer leaf as a standard measurement. Always check the product datasheet for Celotex before installing their products.
Step One – Remove any excess mortar from inside each section of the inner leaf once they have been raised.
Step Two – Install the first row of wall ties in the inner leaf, making sure they are placed at 600mm horizontal centres and at least one course of blockwork below the damp proof course.
Solid concrete floors; wall ties should start at either one course of blockwork below the damp proof course or, depending on your location, a specified distance below the top surface of the ground floor perimeter insulation upstand, this is 150mm in the UK and 225mm in Ireland.
Suspended timber floors; wall ties should start a minimum of 200mm below the top surface of the ground floor perimeter insulation upstand.
Continue constructing the inner leaf; the next course of wall ties should be positioned at regular horizontal centres.
Step Three – Install the second and following rows of ties at 450mm centres vertically with a maximum of 900mm horizontally. If structural purpose affects this, you may need to install ties at closer centres.
Position extra wall ties at jambs for all openings.
Step Four – Place the boards between the wall ties. Make sure each insulation board is retained tightly against the inner leaf and then secure each one with a retaining clip. All boards should be retained at a minimum of three points. You can use additional ties to ensure proper retention of the boards.
In order to minimise any heat loss, make sure that all joints are tightly butted. If there are any internal or external angles make sure the thickness of the board is maintained around the angle and secure with suitable wall ties.
Step Five – Build the outer leaf up so that it is inline with the top of the insulation boards.
Things to note: If there is a gable the insulation boards must continue 200mm above the top storey ceiling height and a cavity tray should be installed above the insulation.
Some cavities are closed at or below the DPC (damp proof course) by a methane barrier membrane. In this instance, use mechanical fixings to secure the board to the brickwork above the DPC without puncturing the membrane.
Always consider manufacturer or professional installation advice.
You will need:
Step One – Check that all services are properly installed and make sure all the studs and battens are secure with no projections.
Step Two – Place the insulation into the timber framing and push it back so that the boards sit with their back against the plywood sheathing. You may need to fit services into the cavity and cut the boards so that they fit between the studs and battens firmly. Make sure to accurately measure, cut and install the insulation boards to maximise thermal performance.
Step Three – Make sure the wall insulation continues with the floor perimeter as you install.
Step Four – To ensure the best possible performance, cut any leftover boards and use the smaller pieces to fill in any gaps in the wall structure. All joints should be tightly butted together to stop any heat from escaping.
Step Five – Once you have filled in all the gaps you should install a vapour control layer. This goes over the warm side of the stud work.
Step Six – Finally, fix your plasterboard lining over the vapour control layer, making sure to use appropriate plasterboard nails or screws.
Always consider manufacturer or professional installation advice.
You will need:
Step One – Using galvanised clout nails, secure your Celotex sheet to the external sheathing. Position the nails at 400mm centres in the centre of the board, and 300mm centres around the parameter.
Step Two – Face the unprinted foil surface towards the air cavity for maximum thermal performance and ensure that all fixings are aligned carefully with underlying studs, headrails and sole plates.
Step Three – Align your boards together tightly. You can make use of spare material by using the off-cuts to fill in any gaps around the waist rails.
Step Four – The final step is to tie back the brickwork to the timber framing using the stainless steel wall ties. Drive through the Celotex insulation board into the studs. When it comes to inserting the ties, insert them approximately 10mm to 20mm above the brick course so a slight ‘crank’ can be applied. Make sure the tie slopes downwards from the sheathing to the outer brickwork.
Always consider manufacturer or professional installation advice.
If you need to install external wall insulation, you will want a solution that doesn’t hugely impact the size of your interior space. Celotex GA4000 boards are great at reducing the risk of thermal bridges formed by mortar joints, while not encroaching too far into the room.
You will need:
Step One – The first step is to create a clean starting point which requires the removal of any skirting boards and architraves. You also need to remove the electrics as these will need to be brought forward once the insulation and plasterboard lining has been installed.
Step two – Find the height of the floor to the ceiling using a measuring tape and mark up the wall battens that go across.
Step Three – Drill pilot holes into the battens as these will be drilled to the wall later. The battens provide a surface for the plasterboard to be fastened to.
Step Four – Next you need to line and level the battens on the wall in the correct positions. Mark the holes and drill.
Step Five – Insert the wall plugs into the holes you’ve drilled and fix the battens into place.
Step Six – Cut the Celotex insulation boards to size so that they’ll fit snugly between the battens. If there are any electrical sockets or pipes etc, these should be cut out of the insulation prior to the plasterboard installation.
Step Seven – Once the Celotex has been measured and cut to size it can be fitted into place between the battens. The breather membrane will be installed over the face of the insulation.
Step Eight – Before you install the breather membrane it is important that you mark out where the frame is as this will allow you to align the fixings neatly with the frame.
Step Nine – Use galvanised steel nails or staples to secure the breather membrane to the frame. To ensure stability, install the membrane to the frame at regular intervals.
Step Ten – Read the manufacturer’s instructions to see how much the joints should be lapped. This is typically 150mm. Some membranes require tape to be used at the joints so be sure to check.
Step Eleven – Install the treated timber battens vertically over both the insulation boards and the breather membrane.
Step Twelve – Finally, install the plasterboards to the battens making sure any pipes, electrical sockets and cables are accounted for and have been carefully measured and cut out.
Always consider manufacturer or professional installation advice.
You will need:
Step One – Check that all services are properly installed and make sure all the studs and rails are secure with no projections.
Step Two – Place the insulation firmly between the studs and push it back so that the boards sit with their back against the plywood sheathing. Make sure to accurately measure, cut and install the insulation boards to maximise thermal performance. Place the unprinted foil surface face against the air cavity within the stud work.
Step Three – To ensure the best possible performance, cut any leftover boards and use the smaller pieces to fill in any gaps in the wall structure. All joints should be tightly butted together to stop any heat from escaping.
Step Four – Install the insulation boards over the studs. Make sure the edges of the boards fit together snugly and are not leaving any gaps for heat to escape.
Step Five – Fix back the boards at both the stud lines and the top and bottom rails. To create a vapour control layer you need to make sure that the joints between the boards are aligned tightly, taped and jointed with the correct tape and jointing material.
Step Six – Finally, vapour seal all perimeter abutments with a sealant. Seal around all penetrations for electrical outlets and switch boxes as well.
Always consider manufacturer or professional installation advice.
You will need:
Step One – You need to install a damp proof membrane either below or over the slab when installing the Celotex insulation boards over slabs. This waterproof barrier will protect against moisture and reduce mould and mildew.
Step Two – Make sure the slab surface is level, smooth and free of any debris or protrusions.
Step Three – Cut the boards and fit them so that they are to the correct floor level. This means ensuring that the upstand depth is equal to the thickness of the screed and insulation. You need to be careful that it does not exceed the thickness of the skirting and wall plaster.
Step Four – Install the Celotex insulation boards onto the slab with all joints loose-laid and brick-bonded.
Step Five – Lay a vapour control layer over the insulation as this will help to prevent condensation.
Step Six – Finally, apply a sand/cement or self-levelling screed over the boards and vapour control layer at a minimum thickness of 65mm.
Always consider manufacturer or professional installation advice.
In residential construction, suspended floor construction is one of the most popular systems. These floors involve a series of inverted T-beams made of prestressed concrete that is cut to specific lengths. The beam and block method is commonly used to replace timber upper floors.
You will need:
Step One – Make sure the beam and block structure’s top surface has been levelled with either grout or a levelling topping. If you are working in an area where 3% or more properties will be impacted by high levels of radon you should fit a radon barrier over the grouting layer. This should reach across the wall cavity to the outer leaf.
Step Two – To prevent cold bridging (a gap in the insulation that can greater the risk of condensation) you should install an appropriate insulation upstand to the perimeter. The upstand should be no higher than the screed level at completion, and no thicker than the wall plaster and skirting board’s combined thickness. Ensure there are no gaps by butting the perimeter upstand tightly against the floor insulation.
Step Three – The Celotex insulation boards should be laid on top of the structural deck or radon barrier in a uniform layer that covers the entire floor. Once they have been laid in formation, tightly butt the joints together to prevent heat loss. Cut the insulation boards neatly around penetrations such as pipes if required.
Step Four – Once the insulation boards are fitted properly you can create a barrier between the insulation and the floor screed with a polyethylene sheet. This barrier helps to prevent moisture from the screed from causing condensation in the board junctions.
Step Five – Apply the floor screed over the insulation boards to a minimum thickness of 65mm to finish.
Screed is a thinner layer of concrete that is often poured over a base floor to form a smooth floor coating, floor finishes can then be installed upon this strong foundation.
You will need:
Step One – If you are installing the boards onto concrete slabs, ensure that these are smooth and dry. For beam and block floors, make sure that they are level and grouted. Roughcast slabs should be smoothed using thin sand blinding.
Step Two – Lay your damp proof membrane and make sure that the joints are well lapped and folded. The membrane should be brought up the surrounding foundation walls to the point of connecting to or forming the wall damp proof course.
Step Three – To prevent cold bridging (a gap in the insulation that can greater the risk of condensation) you should install an appropriate insulation upstand to the perimeter. The upstand should be no higher than the screed level at completion, and no thicker than the wall plaster and skirting board’s combined thickness. Ensure there are no gaps by butting the perimeter upstand tightly against the floor insulation.
Step Four – Install the Celotex insulation boards loose-laid and brick-bonded and make sure that joints are tightly butted.
Step Five – At this stage you can add an additional layer of insulation. If you do, make sure that the joints do not line up with each other. Lay your extra layer horizontally offset to avoid overlapping the joints.
Step Six – Lay your polyethylene sheet over the insulation boards to act as a vapour control layer. The sheet must have 150mm overlaps, be taped at the joints, and should be turned up at the walls 100mm.
Step Seven – You can now apply screed over the floor.
Always consider manufacturer or professional installation advice.